First steps in the Studio
The Clipfer Studio in five minutes, from signing in to the sidebar, the Home page, the steps of each tool, My projects, your credits and the support button.
Clipfer is an online video studio: everything happens in your browser, ideally on a computer. Once you are signed in, you land on the Studio's Home page, where the five tools, your projects and your subscription are one click away. Here is what to know before your first batch.
Signing in
- Open clipfer.com and click Sign in at the top right.
- Enter your Email address and Password, then click Sign in.
- Tick Remember me if this is your own computer: the session stays open for thirty days.
A new account gets 10 free credits, no card needed. If you do not have an account yet, read Creating an account and signing in.
The Home page
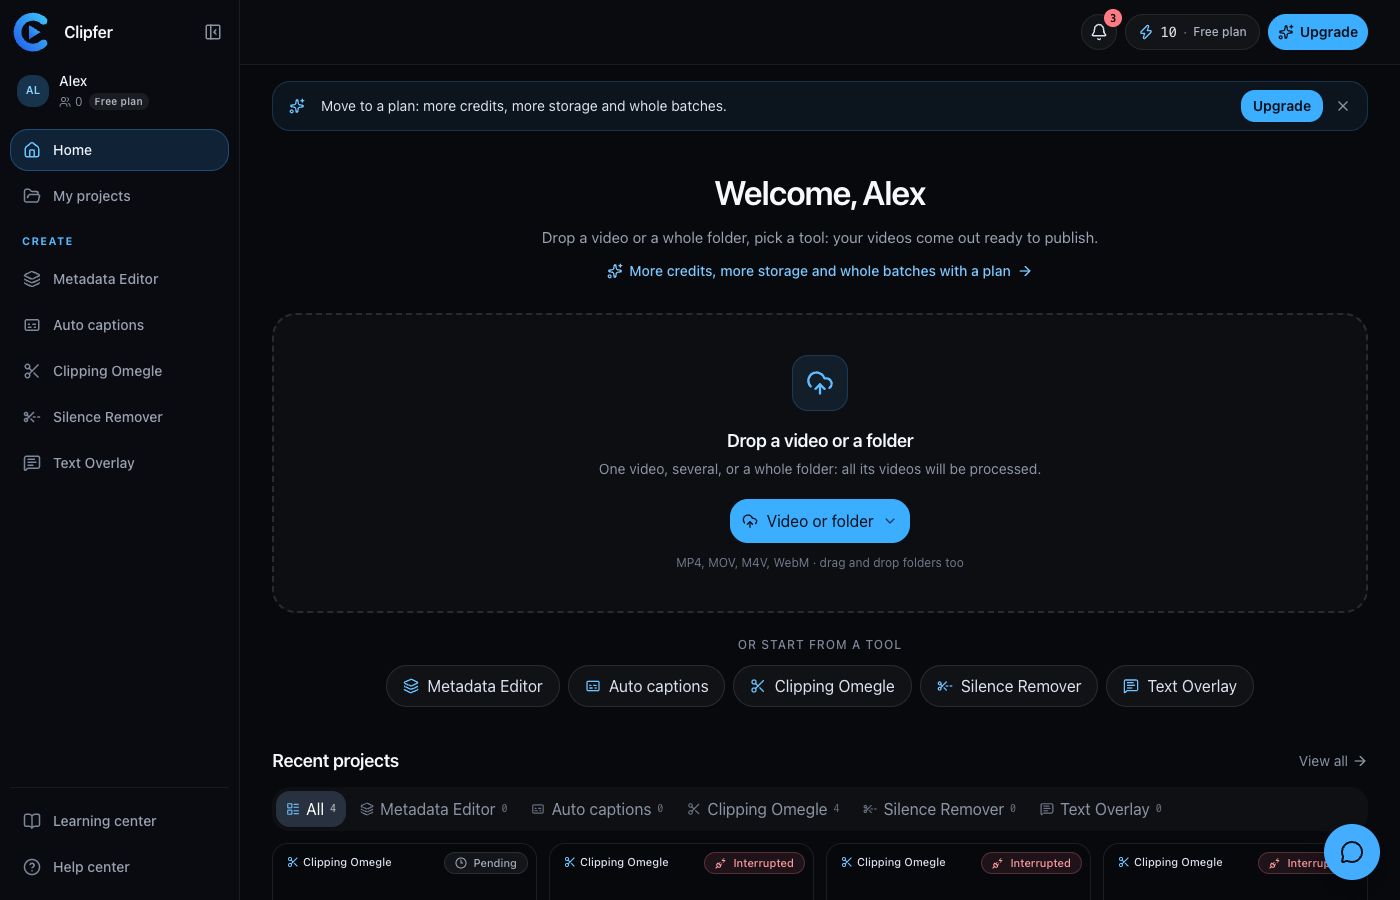
The landing page offers a large Drop a video or a folder area with a single button, Video or folder, that takes one video, several, or a whole folder. Once the files are chosen, click one of the five tools below (Or start from a tool): it opens with the videos already uploaded. Further down, Recent projects lists your latest batches, and What's new the latest Clipfer updates.
The sidebar
On the left, the sidebar is collapsed by default (icons only); the Expand sidebar button opens it and the choice is remembered. Clicking the Clipfer logo takes you back Home.
- Under the logo, the account block: your avatar, your name and your plan badge (Free plan, Creator, Pro, Agency). It opens the account menu.
- Home and My projects.
- The Create group: Metadata Editor, Auto captions, Clipping Omegle, Silence Remover and Text Overlay.
- At the bottom, Learning center and Help center, which open in a new tab so a running job is never interrupted.
At the top right of every page: the What's new bell, your balance (N credits · see subscription) and the Upgrade button, which leads to the Subscription page.
The steps at the top of each tool
All tools follow the same pattern: a step bar at the top, a batch summary next to it, and an action bar at the bottom with Previous step and the button that leads to the next step (for example Continue to the settings).
| Tool | Steps |
|---|---|
| Metadata Editor | Upload → Configure → Preview → Export |
| Auto captions | Upload → Configure → Transcribe → Review → Export |
| Clipping Omegle | Upload → Frame → Configure → Analyze → Select → Review → Export |
| Silence Remover | Upload → Configure → Analyze → Review → Export |
| Text Overlay | Import → Analyse → Text → Adjust → Check → Export |
A step is only marked Completed when something real is done: videos uploaded, a framing confirmed, files rendered. When a button is greyed out, the message next to it says what is missing, for example Upload some videos first.
Before starting a job
Right before any paid action, a window sums up the batch and shows the line Cost: … — you have … left. Nothing is charged until you click Start processing. During a render, keep the tab open; you can keep moving around the Studio. Each batch shows up in My projects right away.
Light or dark theme, language
Open the account menu (the block under the logo). The Theme and Language entries unfold there: Light, Dark or System on one side, French or English on the other. The setting applies at once and follows your account from one device to the next.
Getting help during a session
The round button at the bottom right of the Studio opens the Clipfer support panel: Send us a message, Service status, Help center, Learning center, What's new and Suggest a feature. The assistant replies right away, using this help center, and you can ask for a human at any time: the team then takes over in the same conversation.